

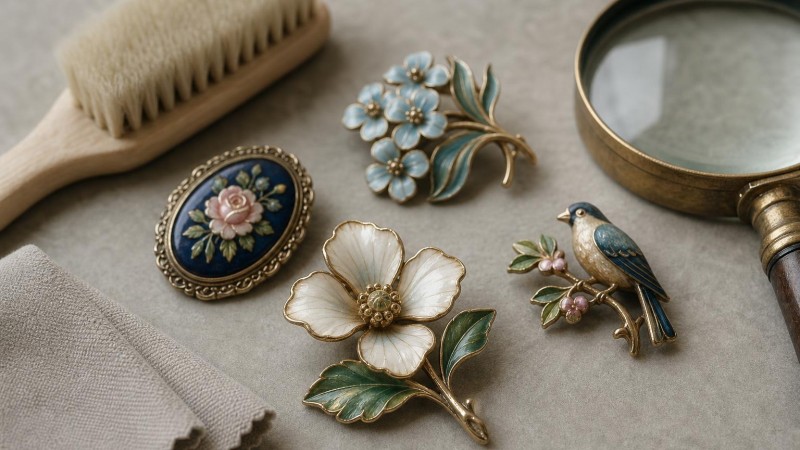
Why Enamel Brooches Need a Gentle Approach
Vintage brooches can be tiny works of art. Many feature hand-applied enamel, detailed metalwork, and carefully set stones that reflect the style of their era. Unlike solid metal jewellery that can sometimes tolerate vigorous polishing, enamel is far less forgiving. It can craze, chip, dull, or lift from the surface if exposed to harsh chemicals, sudden temperature changes, or too much pressure.
If you have inherited a floral brooch, found an Art Deco pin at an estate sale, or simply want to preserve a favourite collectible, restoration should begin with one goal: stabilise first, improve second. In other words, resist the urge to make an old piece look brand new. The charm of vintage jewellery often lies in its age, subtle wear, and original finish.
For collectors, makers, and careful hobbyists alike, learning how to clean and refresh enamel safely is a valuable skill. It also helps you recognise when a piece is better left untouched or handed to a professional conservator.
What Makes Enamel So Delicate?
Enamel is essentially powdered glass fused onto metal at high temperatures. Once cooled, it forms a hard, glossy surface, but hard does not always mean durable in the way people expect. Enamel can crack from impact, react poorly to stress in the metal beneath it, and lose its lustre when scrubbed with abrasive tools.
Vintage brooches may include different kinds of enamel work, including guilloché over engine-turned metal, cloisonné with metal wires separating colours, and painted cold enamel on later costume pieces. Each type can age differently. Some remain stable for decades, while others become fragile due to moisture exposure, corrosion under the enamel, or repeated cleaning with unsuitable products.
Older brooches may also combine enamel with rhinestones, marcasites, seed pearls, or natural materials. A single restoration mistake can affect all of these parts at once. That is why a careful inspection matters more than any cleaning solution.
Start With Assessment, Not Cleaning
Before you touch water, soap, or polish, examine the brooch in bright indirect light. A jeweller's loupe or magnifying glass can reveal issues that are easy to miss with the naked eye. Look for chipped edges, hairline cracks, cloudy areas, loose stones, dark corrosion around settings, or signs that the pin stem or clasp has been bent.
Gently tilt the brooch to see how light moves across the enamel. A healthy surface usually reflects evenly, while damaged enamel may show dull patches or tiny fracture lines. If you hear rattling when the piece is lightly moved, stop there and investigate further before cleaning.
Check for these warning signs
- Flaking or lifting enamel near edges
- Cracks running across a coloured area
- Green corrosion around brass or copper bases
- Loose stones, beads, or accents
- A pin hinge or clasp that feels unstable
- Powdery residue on the back of the brooch
If the piece shows active deterioration, especially lifting enamel or deep cracks, home restoration may do more harm than good. In that case, the safest choice is a professional who specialises in antique or costume jewellery conservation.
Tools and Materials That Are Usually Safe
When a brooch is structurally sound and only needs surface care, choose the mildest materials possible. The best restoration kit is small, soft, and simple. Avoid the temptation to use all-purpose household cleaners or strong jewellery dips. Products designed to strip tarnish can permanently damage enamel and nearby adhesives.
Useful supplies for gentle restoration
- Soft microfibre cloth
- Cotton buds with tightly wound tips
- Soft artist's brush or baby toothbrush
- Lukewarm distilled water
- Mild fragrance-free soap
- Wooden toothpicks for careful debris lifting
- Clean dry towel
- Magnifying loupe
If you already work on jewellery projects, some bench tools may be familiar, but do not assume that equipment used for assembling pieces with jump rings or metal findings is suitable for enamel restoration. Enamel responds best to low pressure and minimal intervention.
What to Avoid at All Costs
Knowing what not to do can save a brooch faster than any cleaning trick. Vintage enamel is vulnerable to abrasion, solvents, and temperature shock. Even popular online cleaning methods can be disastrous on older pieces.
Never use these on delicate enamel
- Ultrasonic cleaners
- Steam cleaners
- Toothpaste or baking soda pastes
- Metal polish on enamelled areas
- Vinegar, ammonia, bleach, or alcohol-heavy cleaners
- Abrasive sponges or stiff brushes
- Soaking for long periods
- Hot water or sudden rinsing from hot to cold
A common mistake is polishing the metal right up to the edge of the enamel. This can undercut the border, leave residue in tiny gaps, and create a bright, overworked look that feels out of place on a vintage piece. Patina often contributes to authenticity, so preserving it is usually wiser than removing it.
Step-by-Step: How to Clean a Vintage Enamel Brooch
1. Remove loose dust first
Lay the brooch on a soft towel. Use a dry artist's brush to lift away surface dust from recesses, petals, and settings. Brush outward rather than pressing downward into cracks. If the brooch includes decorative elements like small beads or dangling parts, support them while cleaning.
2. Spot-clean instead of soaking
Mix a drop of mild soap into a small dish of lukewarm distilled water. Dip a cotton bud into the solution, then blot it so it is barely damp. Gently roll the bud over dirty areas rather than scrubbing. Work in small sections and keep moisture away from the pin mechanism as much as possible.
This method is particularly useful around tiny design elements, whether the brooch is paired in storage with freshwater pearls or other moisture-sensitive materials that also require care. Controlled cleaning is almost always safer than immersion.
3. Clean crevices carefully
For grime caught near metal edges, use a wooden toothpick wrapped in a tiny bit of microfibre. Move slowly and do not pry. The goal is to lift dirt, not to test how firmly the enamel is attached. If residue does not release easily, leave it and reassess rather than forcing it.
4. Dry immediately
After spot-cleaning, wipe the brooch with a dry microfibre cloth and allow it to air dry on an absorbent towel. Place it face up in a room with stable temperature and low humidity. Never use a hair dryer or set it near a heater.
5. Reinspect under magnification
Once dry, check the brooch again. Sometimes cleaning reveals hidden cracks, missing foil behind stones, or old repairs. If anything now looks unstable, pause before attempting any further restoration.
Dealing With Tarnish Near Enamel
Tarnish is one of the trickiest issues on enamel brooches because the safest treatment for metal is not always safe for the enamel next to it. If the tarnish is light, often the best option is to leave it alone. A soft cloth may be enough to reduce surface dullness on exposed metal backs or pin stems without touching the decorative front.
If you decide to address tarnish on a metal-only area, isolate the enamel carefully. Use a cotton bud and the smallest amount of product possible, keeping well away from edges. Many restorers prefer not to polish the front at all unless the design can tolerate it. The contrast between gently aged metal and glossy enamel often looks more authentic than an aggressively bright finish.
Brooches that incorporate decorative stone accents, including pieces stored alongside amethyst beads or faceted glass, benefit from a conservative approach. Residue from polishing compounds can lodge in settings and become difficult to remove.
Can Chipped Enamel Be Repaired at Home?
Small chips raise a difficult question: repair or preserve? In most cases, preserving the damage is safer than attempting a perfect-looking fill at home. DIY enamel repair kits exist, but colour matching, gloss matching, and texture blending are challenging. A visibly patched area may stand out more than the original chip.
If the chip has sharp edges or seems likely to spread, professional stabilisation is worth considering. A specialist may use conservation-grade materials to secure the area without pretending the piece is untouched. That approach respects the age of the brooch while preventing further loss.
Home collectors sometimes use reversible conservation waxes on surrounding metal for protection, but these should never be smeared across enamel damage as a substitute for repair. Any treatment should be minimal, documented, and tested first in an inconspicuous area if appropriate.
How to Handle Loose Stones, Findings, and Pins
Many vintage brooches combine enamel with glued or set accents. If a rhinestone wiggles, a pin stem is bent, or a clasp is misaligned, resist quick fixes with strong craft glue. General adhesives can stain enamel, overflow onto the surface, and become brittle over time.
For minor mechanical issues, such as a clasp that no longer closes smoothly, cleaning away grime may help. But if a finding is cracked or detached, a professional repair is usually the safest choice. This is especially true when the brooch includes small components similar to those used by wire wrappers or jewellery makers, where tension and alignment affect the whole structure.
If a stone has already fallen out, store it in a labelled bag with the brooch. Even if you cannot reset it yourself, having the original component improves the chances of a sympathetic repair later.
Storage Matters as Much as Restoration
Once a brooch is cleaned, proper storage helps prevent the same problems from returning. Enamel dislikes knocks, pressure, and damp conditions. Vintage pieces should not be tossed into a mixed jewellery box where hard stones and metal chains can scratch them.
Best storage practices for enamel brooches
- Store each brooch separately in a soft pouch or lined box
- Keep humidity low and temperature stable
- Avoid direct sunlight for long periods
- Fasten the pin clasp before storing
- Do not stack heavy jewellery on top
- Use acid-free tissue for extra cushioning if needed
If you collect antique jewellery supplies as well as finished pieces, keep brooches away from loose components like cabochons, chains, and tools that can cause accidental chips. Organisation is part of preservation.
Interesting Facts About Vintage Enamel Jewellery
Enamel jewellery has a long and fascinating history. Ancient civilisations used vitreous enamel in decorative objects long before modern costume jewellery made brooches widely accessible. In the 19th and early 20th centuries, enamel flourished in styles ranging from Art Nouveau flowers and insects to geometric Art Deco motifs.
Some collectors love symbolic enamel colours. In folklore and decorative arts, blues were often associated with calm or protection, while green shades were linked with growth and nature. When brooches incorporated gemstone accents, certain stones were traditionally believed to carry meaning as well. For example, amethyst was historically associated with clarity and restraint in various cultures. These associations are part of jewellery history and storytelling, not scientific claims.
Because many enamel techniques were labour intensive, even small brooches can reveal remarkable craftsmanship under magnification. Fine wire divisions, hand-painted shading, and subtle colour transitions are easy to overlook until you examine them closely.
When to Call a Professional Conservator
There is no shame in stopping before a restoration goes too far. In fact, restraint is often what protects a brooch for the next generation. Seek expert help if the piece has sentimental or collector value, significant enamel loss, severe corrosion, missing structural parts, or evidence of prior failed repairs.
A trained conservator or experienced antique jewellery restorer can assess whether the piece needs stabilisation, cleaning, mechanical repair, or simply safer storage. They may also be able to identify the era, construction method, and likely causes of damage, which can help you care for similar pieces in your collection.
Final Thoughts
Restoring vintage brooches without damaging delicate enamel comes down to patience, observation, and a light touch. Start by assessing the condition carefully. Clean only when necessary, use the mildest materials possible, and avoid aggressive methods that promise instant shine. In many cases, the best restoration is simply gentle cleaning, proper storage, and knowing when to stop.
For jewellery lovers, vintage brooches offer a wonderful link between design history and personal style. Whether you collect finished pieces, enjoy making jewellery with quality supplies from PebbleBead, or appreciate the artistry behind old materials and settings, learning to preserve enamel is a skill that rewards care over speed. Treat each brooch as a small heirloom, and it can remain beautiful for years to come.
Leave a Comment